Garage life continues as blogging life falls behind. I have a choice, either sit in front of the computer and write or spend time in the garage. I chose the latter.
I figured this latest project was worthy of a posting so I dedicated some time getting myself organized in order to show the internet what has been happening in my garage. A friend of mine wanted some “automotive decor” for his office. He had recently purchased a 997 Porsche and I was telling him how I had a stock pile of old Porsche parts that were waiting be built into something. After tossing some ideas around we settled on turning a Brembo caliper and Porsche composite ceramic brake rotor into a floor lamp. He let me have creative freedom with it which was nice.
After many nights of brainstorming how to suspend a caliper from a perch to create a typical floor lamp and decided to try and keep the entire structure automotive themed. I’ve always loved pushrod suspension so I decided I would incorporate it into the design. After designing the control arms and pivot points in a CAD program I determined that I should be able to make it work.
I just started to build on the fly. I began by getting some LED lights from Ikea and machining a 6061 aluminum plate to house them. I then just kept going and working my way backwards until I reached the base. I could write pages on the thought process and the implementation however everyone just skips to the pictures so I’ll spare myself the time.
If something isn’t clear and you want some clarification just shoot me a comment, I’ll be happy to answer any questions. Enjoy the post below.

So it all started with a used caliper that was taken out of service because of a botched powder coating job from a local company and a Porsche PCCB rotor that went metal on the inside pad. The caliper is half stripped of powder coating because awhile back I bought some powder coating stripper and wanted to try it out so I half stripped this spare caliper. It works really well.

I started the project from the caliper end. I bought some LED lights, the right dimension, from Ikea. I then dropped some 6061 aluminum onto the mill and started chipping away until I could mount the LEDs to the machined plate.

This is the final machined plate that the bezels of the LED lights will screw into. In the end I opted to leave the plate as a machined finish.

The 3 LED lights mounted up well. In keeping with the Ikea tradition I chose to keep the Allen key bolts. As I type this I realize I should have gone to Ikea and obtained some of their “extra” hardware to mount the plate.

So I have a lot of pictures but can only display so many. I spent some time in a CAD program designing the length, and pivot points, of the pushrod suspension components. Once I had it finalized on the computer I went into production. This is a shot of the fabricated components getting mocked up into a control arm so it can be welded.

All the welding on the project was done with my Miller Syncrowave 180SD TIG machine.

Upper and lower control arms got mocked up to check alignment. The knob close to the caliper is a camber adjustment that I machined. In the end I thought it was kinda stupid so I opted to scrap it.

Brackets are getting built and components are getting tacked into place to bring the pushrod suspension into play.

Fulcrum brackets got plasma cut out and bushings machined to give the suspension some pivot.

I set the homebuilt CNC plasma table up for the project. It was so nice to work with. Because I was building the lamp on the fly I was coming up with ideas as the project progressed. I had my laptop out in the garage and CAD’d and cut brackets as I went along. Huge time saver.

I was going to have to build a custom “shock” to help support the weight of the caliper so I mocked the setup on the bench to get an idea of the weight and travel that was going to have to be dealt with.

The shock all got built out of aluminum. I needed to machine, and weld, some end caps into the shock tube. I set it up on the lathe as a “poor mans” rotary table and put the TIG torch to it.

Upper shock mounting was machined into a 6 bolt flange to accept the shock rod and provide some guidance.

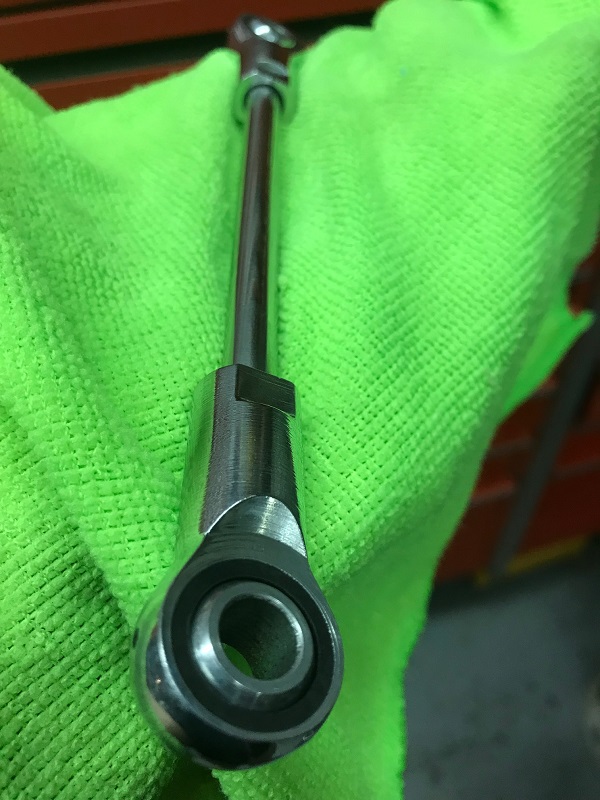
All the components that make up the “suspension” and provide some support to the caliper.

Never really had a solid vision for the post so I started scrounging for stuff I had hoarded. Located a rear carden shaft off a Cayenne that was the right diameter but required some shortening. I chopped it down on the bandsaw and then remachined and rewelded the ends into a solid shaft.

Continuing on with the post the lower half was going to require some weight in order to support the caliper and suspension. I had a chunk of 3.5″ Schedule 80 pipe left over from my gazebo railing project. It had some good weight to it and it turned out that it dialed in the “power to weight” ratio perfectly. Plus I love soaking the heat into my welds so it was a pleasure to work with.

Here the Porsche Cayenne rear carden shaft got mated to the scheduled 80 pipe.

More progress in fabricating, mocking up, and tacking in the suspension brackets.

I needed to incorporate a supplied Porsche emblem and was struggling. I dug through the tickle trunk and found a Porsche air cooled 993 piston and connecting rod. Figured I would cut it up and see what I could turn it into.

In keeping with the Jonathan Goldsmith tradition the “library lamp” required somewhere to place a glass of whiskey so a shelf was in order. Buzzed one out on the plasma table then lined the perimeter with some 1″ flatbar

Needed to drill, and tap, some holes to mount the piston to that would serve as the background for the Porsche emblem. I wasn’t about to drill schedule 80 pipe by hand so I set it up on the mill to make life easier.

Mocked up whiskey shelf and emblem to make sure things are going to work, not sure I am totally happy with it.

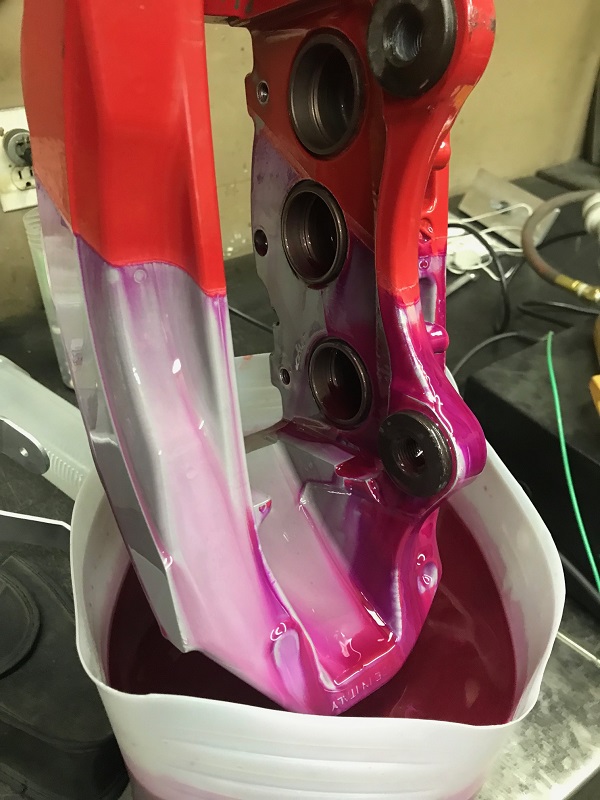
With most of the fabrication complete it was time to move onto finishing stage. Most of the components would either get powder coated, polished, or brushed. The powder coated items got glass bead blasting before getting foggged.
The half stripped caliper need to get all stripped. A soaking in the stripping solution and then a cold water rinse made easy work of it.

Clean, fresh aluminum is so satisfying.

The Brembo caliper then got a fresh flogging of red powder coat to bring it back to new,

Tucked it into the oven at 375 degrees for a 30 minute soaking.

While the powder coated caliper was getting baked I cleaned, and polished, the caliper hardware.

The baking is all done and the aroma has filled the shop. “The smell of good powdercoating baking, like the sound of lightly flowing water, is indescribable in its evocation of innocence and delight…”

Time for the “Porsche” to be united with the Brembo.
Lots of the finishing stage required 3 stage polishing. I always try to find a visual balance among all the components when it comes time to clothe them.

I wasn’t loving the stark naked aluminum shock. So I risked it all and powder coated the tube matte black then dropped a 1/2″ ball nose end mill into it. I think it was the right choice.

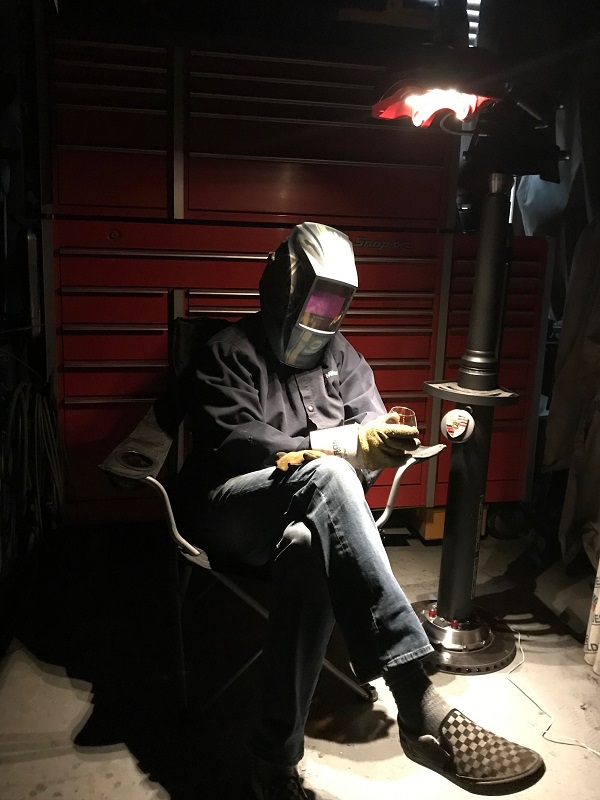
Yup, the light should be adequate. If not then I recommend sticking to audio books.
Due to the vertical stance of the lamp it is somewhat difficult to get an good overall picture of it. I posted a short video below highlighting the features of the project.
Click on the pictures below to see them in full screen.